We R Makers Ultimate Button Press Mega Kit

SKU: 726290

Regular price $212.49
Sale price $212.49 Regular price $249.99
Save 15% SOLD OUT
Shipping calculated at checkout.

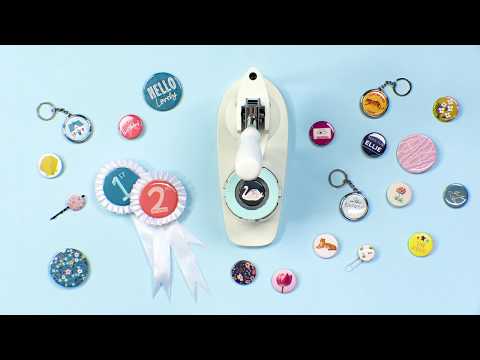
Explore endless creative possibilities with the We R Makers Ultimate Button Press Bundle. Craft custom pins, buttons, badges, and keychains effortlessly with this comprehensive set, which includes a button press bundle, heart insert, heart buttons, and pin back refills. With small, medium, and large round press inserts, you can create buttons of various sizes to suit your needs. Add a charming touch to your projects with adorable heart-shaped designs using the heart insert and heart buttons. Ensure you have an ample supply of supplies with the included pin back refill. Whether you're a seasoned DIY enthusiast or just starting out, this bundle is perfect for adding a personalized touch to your accessories. Elevate your crafting experience and bring your creative ideas to life with the We R Makers Ultimate Button Press Bundle.

What's in the Ultimate Mega Kit?

  • Button Press Bundle, which includes:
    • Button Press Tool
    • Small, medium and large round press inserts
    • Cutting insert for precision crafting
    • Adhesive foam stickers for embellishments
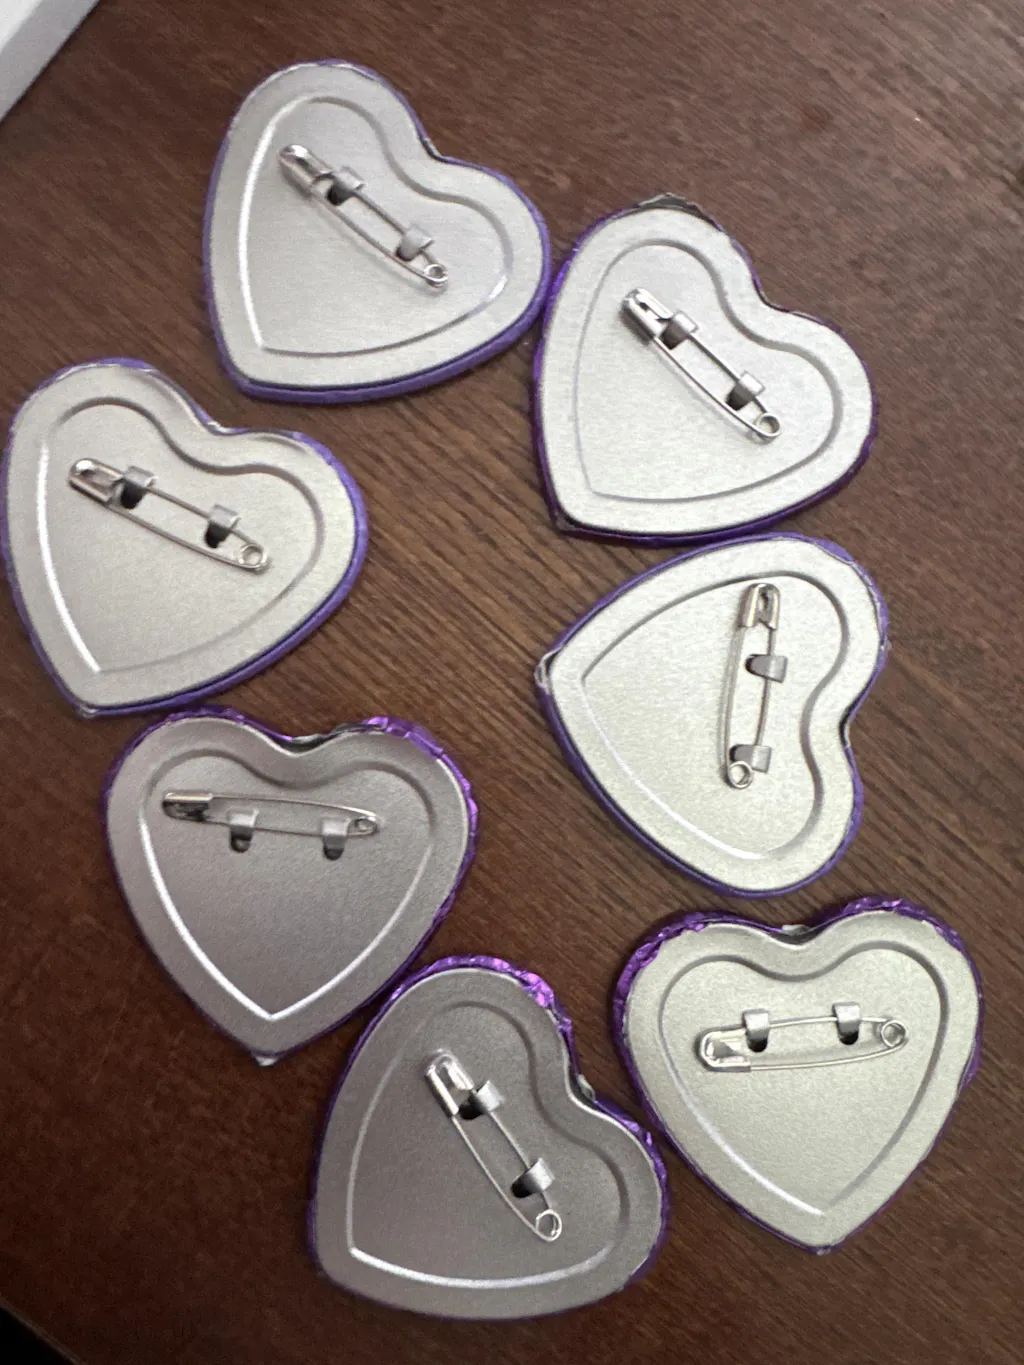
  • Button Press Heart Button Insert
  • Button Press Heart Button Refills 9pk (x2)
  • Button Press Pin Back Refill small (30 Pins)
  • Button Press Pin Back Refill Medium (25 pins)
  • Button Press Pin Back Large (18 pins)

The We R Makers Button Press tool gives you everything you need to design and craft personalized buttons with ease. The user-friendly design makes it suitable for beginners and experienced crafters alike, offering endless creative possibilities.


Got your Button Press?

Now add the We R Makers Ink Pads and bring your designs to life — bold, layered, and beautifully aligned.

Title

Product Resources

Bring your creative ideas to life with the WR Button Press Kit.

This 20-piece DIY set makes it easy to create custom buttons, pins, and embellishments for any occasion. Whether you're designing party favors, school projects, scrapbook accents, or personalized gifts, this kit provides everything you need to get started.


The easy-to-use press system helps you achieve secure, polished results without complicated tools or setup. Perfect for makers of all skill levels, the WR Button Press Kit adds a fun and customizable element to your crafting projects.


We R Makers — tools designed to make crafting smarter, easier, and more creative.

Features

Instructions

Videos

the button press kit: personalize every project

Features and Benefits

CREATE CUSTOM BUTTONS WITH EASE — Design and press personalized buttons, pins, and embellishments for crafts, gifts, and events.

COMPLETE 20-PIECE KIT — Includes essential components to get started making custom buttons right out of the box.

PERFECT FOR DIY PROJECTS — Ideal for scrapbooking, party favors, school projects, branding, and handmade gifts.

EASY-TO-USE DESIGN — Simple press system helps create clean, secure buttons with professional-looking results.

MADE FOR MAKERS — Great for beginners and experienced crafters who want to add a personal touch to their projects.

How to Create Custom Buttons in Minutes

Our easy-to-follow instructions will guide you! You can also download them as a PDF to keep them at hand.

Downloadable PDF

  • English

  • french

  • ESPANOL

  • german

Rotate both TOP and BASE INSERTS to position A, aligning with arrows on
HOUSING.

Place BUTTON SHELL upright into BASE INSERT.

Layer cut paper design over BUTTON SHELL using PIN LINE as a guide to make sure text and imagery is straight.

For a glossy protective layer, place MYLAR over cut paper design. Omit this step if a matte paper finish is desired.

Swivel BASE HOUSING into place under UPPER HOUSING. It will click into
place.

Press HANDLE.

Swivel BASE HOUSING back out of machine. Note, top pieces of button are
now in the TOP INSERT.

Rotate both TOP and BASE INSERTS to position B, aligning with arrows on
HOUSING.

Place PIN-BACK pin side down into BASE INSERT. Align the pin parallel to
the PIN LINE. Check that PIN is flush against PIN-BACK.

Swivel BASE HOUSING into place under TOP HOUSING. It will click into
place.

Press HANDLE.

Swivel BASE HOUSING back out of machine to retrieve finished button. If the
button is difficult to take out, simply remove the BASE INSERT and press the
center up to pop the button out.

Tournez les INSERTS SUPÉRIEURS et DE BASE en position A, en alignant
avec la flèche sur le BOÎTIER.

Placez la COQUE DU BOUTON en position verticale dans l'INSERT DE
BASE.

Placez le papier découpé en couche sur la COQUE DU BOUTON en utilisant
la LIGNE D'ÉPINGLE comme guide pour vous assurer que le texte et les
images sont droits.

Pour une couche protectrice brillante, placez MYLAR sur le papier découpé.
Omettez cette étape si vous souhaitez une finition au papier mat.

Faites pivoter le BOÎTIER DE BASE en place sous le BOÎTIER SUPÉRIEUR.
Il cliquera lorsqu'il sera en place.

Appuyez sur la POIGNÉE.

Pivotez le BOÎTIER DE BASE en arrière de la machine. Remarquez, les
morceaux de bouton supérieurs sont maintenant dans l'INSERT
SUPÉRIEUR.

Tournez les INSERTS SUPÉRIEURS et DE BASE en position B, en alignant
avec la flèche sur le BOÎTIER.

Placez l'épingle avec L'ARRIÈRE POUR ÉPINGLE vers le bas dans l'INSERT
DE BAS. Alignez l'épingle parallèlement à la LIGNE DE D'ÉPINGLE. Vérifiez
que L'ÉPINGLE est affleurante contre L'ARRIÈRE POUR ÉPINGLE.

Faites pivoter le BOÎTIER DE BASE en place sous le BOÎTIER SUPÉRIEUR.
Il cliquera lorsqu'il sera en place.

Appuyez sur la POIGNÉE.

Faites pivoter le BOÎTIER DE BASE vers l'arrière de la machine pour
récupérer le bouton fini. Si le bouton est difficile à retirer, retirez simplement
l'INSERT DE BASE et appuyez au centre vers le haut pour faire sortir le
bouton.

Rote tanto el ENCARTE SUPERIOR como el de la BASE a la posición A,
alinéelos con la flecha en la CARCASA.

Coloque la TAPA DEL BOTÓN mirando hacia arriba en el ENCARTE DE LA
BASE.

Corte en capas el diseño del papel sobre la TAPA DEL BOTÓN con la LÍNEA
DEL ALFILER como guía para asegurarse de que tanto el texto como las
imágenes queden derechos.

Para lograr una capa protectora brillante, coloque la mica MYLAR sobre el
diseño de papel cortado. Omita este paso si quiere un acabado en papel
mate

Gire la CARCASA DE LA BASE hasta colocarla en su lugar debajo de la
CARCASA SUPERIOR. Escuchará un clic cuando quede en su lugar.

Presione la MANIJA.

Gire la CARCASA DE LA BASE para sacarla de la máquina. Observe que las
piezas del botón están ahora en el ENCARTE SUPERIOR.

Rote tanto el ENCARTE SUPERIOR como el de la BASE a la posición B,
alinéelos con la flecha en la CARCASA.

Coloque el alfiler con el REVERSO DEL ALFILER hacia abajo en el
ENCARTE DE LA BASE. Alinee el alfiler paralelo a la GUÍA DEL ALFILER.
Verifique que el ALFILER esté apretado contra el REVERSO DEL ALFILER.

Gire la CARCASA DE LA BASE hasta colocarla en su lugar debajo de la
CARCASA SUPERIOR. Escuchará un clic cuando quede en su lugar.

Presione la MANIJA.

Gire la CARCASA DE LA BASE para sacarla de la máquina y sacar el botón
terminado. Si le resulta difícil sacar el botón, solo retire el ENCARTE DE
BASE y presione el centro hacia arriba para que el botón salga

EINSCHUB OBEN und EINSCHUB UNTEN auf Position A drehen und auf
den Pfeil auf dem GEHÄUSE ausrichten.

Die BUTTON-HALBSCHALE senkrecht in den EINSCHUB UNTEN einsetzen.

Das ausgeschnittene Papiermotiv über die BUTTON-HALBSCHALE
schichten, wobei Sie die ANSTECKNADELLINIE als Führung benutzen, um
sich zu vergewissern, dass Text und Bild gerade sind.

Für eine glänzende Schutzschicht die POLYESTERFOLIE über das
ausgeschnittene Papiermotiv legen. Diesen Schritt überspringen, wenn eine
matte Papieroberfläche erwünscht ist.

Das GEHÄUSE-UNTERTEIL in Position unter dem GEHÄUSE-OBERTEIL
schwenken, bis es einrastet.

GRIFF drücken.

Das GEHÄUSE-UNTERTEIL zurück aus der Maschine schwenken. Hinweis:
Die obersten Teile des Buttons befinden sich jetzt im EINSCHUB OBEN.

EINSCHUB OBEN und EINSCHUB UNTEN auf Position B drehen und auf
den Pfeil auf dem GEHÄUSE ausrichten.

Die Anstecknadel an der ANSTECKNADELSEITE nach unten in des
EINSCHUB UNTEN einsetzen. Die Anstecknadel parallel zur
ANSTECKNADELLINIE ausrichten. Kontrollieren, ob die ANSTECKNADEL
bündig zur ANSTECKNADELSEITE ist.

Das GEHÄUSE-UNTERTEIL in Position unter dem GEHÄUSE-OBERTEIL
schwenken, bis es einrastet.

 GRIFF drücken.

Das GEHÄUSE-UNTERTEIL zurück aus der Maschine schwenken, um den
fertigen Button herauszunehmen. Falls der Button schwer herauszunehmen
ist, entfernen Sie einfach den EINSCHUB UNTEN und drücken Sie die Mitte
nach oben, damit der Button herauss

Videos & Tutorials

Alt image
Alt image